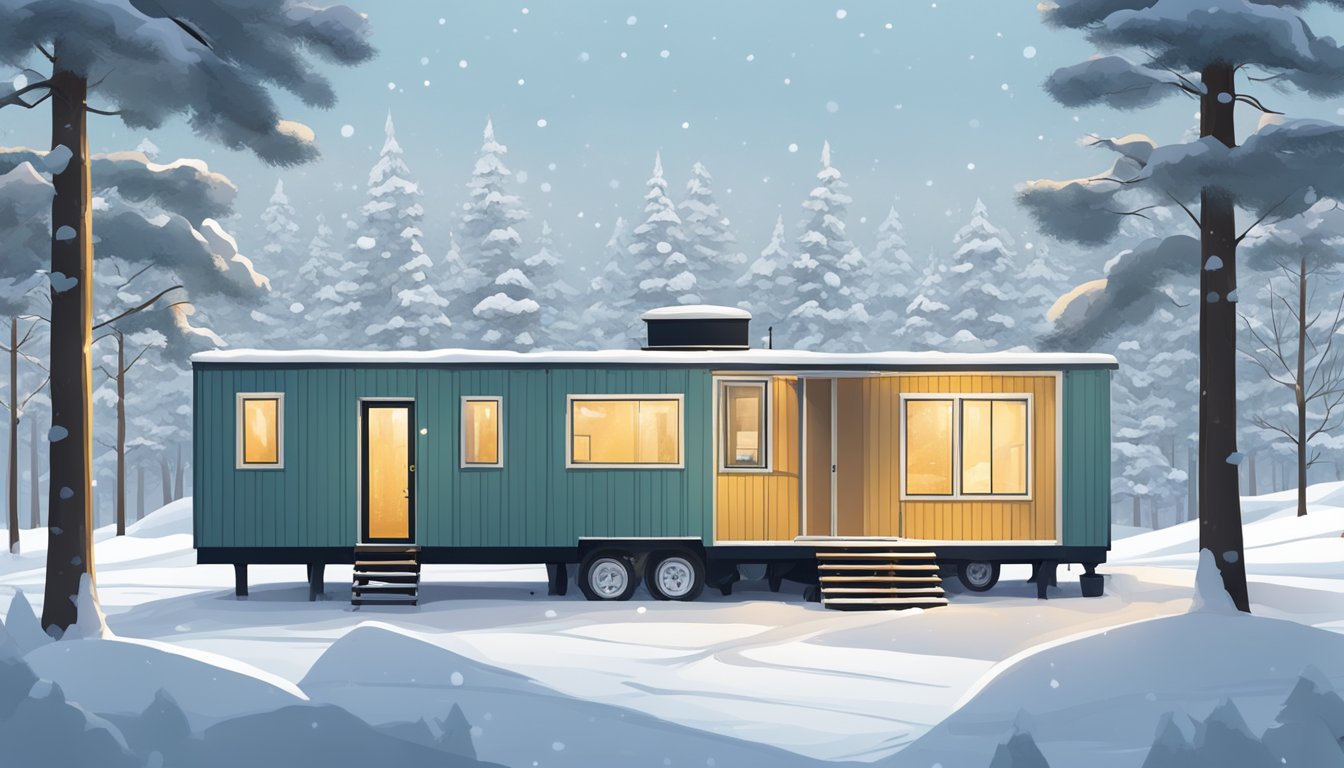
As winter approaches, single-wide mobile home owners face unique challenges in protecting their homes from harsh weather. Winterizing a single-wide is crucial for maintaining comfort, preventing damage, and reducing energy costs during the colder months. Proper winterization can save homeowners up to 15% on heating bills and prevent costly repairs from frozen pipes or structural damage.
Preparing a single-wide for winter involves both interior and exterior measures. From sealing windows and doors to insulating pipes and skirting, each step plays a vital role in creating a warm, energy-efficient living space. This guide will explore essential winterization techniques tailored specifically for single-wide mobile homes, helping owners tackle the cold season with confidence.
By implementing these winterization strategies, single-wide residents can ensure their homes remain cozy and protected throughout the winter. The following sections will provide detailed instructions on key areas to address, from roof maintenance to HVAC system preparation, enabling homeowners to create a comprehensive winterization plan for their single-wide mobile homes.
Assessing Your Single Wide for Winterization
Proper winterization of a single wide mobile home starts with a thorough assessment. This evaluation identifies areas of heat loss, potential air leaks, and insulation deficiencies that need addressing before cold weather sets in.
Conducting an Energy Audit
An energy audit provides valuable insights into a single wide’s energy efficiency. Professional auditors use specialized tools like infrared cameras to detect heat loss areas. They examine windows, doors, walls, and the roof for thermal deficiencies.
DIY energy audits are also possible. Homeowners can use a handheld infrared thermometer to check for temperature differences on interior surfaces. These variations often indicate insulation gaps or air leaks.
Another simple test involves holding a lit incense stick near potential draft areas on a windy day. Smoke movement reveals air infiltration points.
Identifying Air Gaps and Air Leakage
Air gaps and leaks are common in single wide homes, especially around windows, doors, and utility entry points. These openings allow cold air to enter and warm air to escape, reducing energy efficiency.
To find air gaps:
- Visually inspect window and door frames for cracks or separations
- Check the seals around electrical outlets and light switches
- Examine the areas where pipes or wires enter the home
Feel for drafts with your hand or use the incense test mentioned earlier. Mark problem areas for later sealing with caulk, weatherstripping, or expanding foam insulation.
Inspecting Insulation Materials
Proper insulation is crucial for maintaining a comfortable temperature in a single wide home. Start by checking the insulation in accessible areas like the underbelly and attic space.
Look for:
- Gaps or compressed areas in fiberglass batts
- Signs of moisture damage or mold growth
- Adequate depth of loose-fill insulation in the attic
Measure the insulation thickness and compare it to recommended R-values for your climate zone. Consider upgrading insulation if it falls short of these standards.
For walls, use an outlet insulation tester to check for insulation presence without damaging drywall. If insulation is lacking, consider professional blow-in insulation services.
Essential Insulation Improvements
Proper insulation is crucial for keeping your single wide warm and energy-efficient during winter. Focus on key areas like the attic, walls, and openings to significantly improve your home’s thermal performance.
Upgrading Attic Insulation
Attic insulation plays a vital role in preventing heat loss. Check current insulation levels and add more if needed. Aim for an R-value of 38 to 60, depending on your climate zone. Loose-fill fiberglass or cellulose are excellent options for attics. Ensure even coverage across the entire space, paying special attention to corners and edges.
Install baffles near the eaves to maintain proper ventilation. This prevents moisture buildup and ice dams. Consider adding a radiant barrier to reflect heat back into your living space. This extra layer can boost overall insulation effectiveness.
Adding Insulation to Walls
Insulating walls in a single wide can be challenging but rewarding. Start by identifying poorly insulated areas using an infrared thermometer. Common methods for adding wall insulation include:
- Blown-in insulation through small holes
- Foam injection between studs
- Removing interior paneling to add batts
Each method has pros and cons. Blown-in cellulose offers good coverage without major demolition. Foam provides excellent air sealing but can be costly. Adding batts allows for vapor barrier installation but requires more extensive work.
Sealing Windows and Doors
Windows and doors are major sources of heat loss. Apply weatherstripping around movable parts to create a tight seal. Use V-strip for double-hung windows and door sweeps for exterior doors.
Install window film for an extra layer of insulation. This clear plastic creates an air barrier, reducing drafts and heat transfer. For older windows, consider storm windows or cellular shades for additional protection.
Caulk around window and door frames to seal any gaps. Use silicone caulk for exterior applications as it’s more durable in harsh weather. Don’t forget to check for gaps around pipes and vents, sealing them with expanding foam insulation.
Heating System Maintenance
Proper maintenance of your heating system is crucial for ensuring comfort and efficiency in your single wide home during winter. Regular upkeep can prevent breakdowns, reduce energy costs, and extend the lifespan of your equipment.
Scheduling Furnace Maintenance
Annual furnace maintenance is essential for optimal performance. Clean or replace air filters monthly to improve air quality and system efficiency. Inspect the furnace for any signs of wear or damage. Check the pilot light to ensure it burns blue, indicating proper combustion.
Clear the area around the furnace of any clutter to prevent fire hazards. Vacuum dust and debris from vents and registers. Test the thermostat to confirm accurate temperature readings.
Consider hiring a professional for a thorough inspection and tune-up before winter sets in. They can identify potential issues and perform necessary repairs.
Using Programmable Thermostats
Install a programmable thermostat to automate temperature control and save energy. Set lower temperatures when you’re asleep or away from home. Program the thermostat to warm up the house before you wake or return.
Many modern thermostats offer smartphone connectivity for remote adjustments. This feature allows you to monitor and control your home’s temperature from anywhere.
Choose a thermostat with multiple daily settings for maximum flexibility. Some models learn your preferences over time, optimizing comfort and efficiency automatically.
Consulting HVAC Professionals
HVAC professionals can provide valuable insights and services for your heating system. They can perform advanced diagnostics to identify hidden issues or inefficiencies.
Ask about the latest energy-saving technologies that might benefit your single wide home. Professionals can recommend and install upgrades like high-efficiency furnaces or zoning systems.
Regular professional maintenance can catch small problems before they become costly repairs. HVAC experts can also advise on proper insulation and weatherization techniques to complement your heating system’s performance.
Schedule an annual inspection with a qualified technician to ensure your system is ready for winter. They can clean components, lubricate moving parts, and check for safety issues.
Windows and Doors Reinforcement
Protecting your single wide’s windows and doors is crucial for staying warm and reducing energy costs during winter. Proper reinforcement keeps cold air out and heat in, creating a more comfortable living space.
Applying Storm Windows
Storm windows provide an extra layer of insulation for your single wide. They fit over existing windows, creating a barrier against drafts and heat loss. Install storm windows on the exterior of your home’s windows.
Measure each window carefully before purchasing storm windows. Choose models that match your window sizes and style. Look for options with low-emissivity coatings to further improve energy efficiency.
Installation typically involves securing the storm window frame to the existing window frame with screws. Ensure a tight seal by caulking around the edges. For a DIY approach, consider using plastic window insulation kits as a temporary alternative.
Installing Thermal and Blackout Curtains
Thermal curtains help insulate windows by trapping a layer of air between the fabric and the glass. Blackout curtains block light and provide additional insulation. Both types can significantly reduce heat loss through windows.
Choose curtains that extend beyond the window frame for maximum effectiveness. Install a curved curtain rod to create a seal against the wall. This prevents warm air from escaping around the edges of the curtains.
For optimal insulation, layer thermal and blackout curtains. Hang thermal curtains closest to the window, with blackout curtains on the room side. Open curtains during sunny days to let in natural warmth, and close them at night to retain heat.
Enhancing Weatherstrip Solutions
Weatherstripping seals gaps around windows and doors, preventing drafts and heat loss. Inspect existing weatherstripping and replace any that’s worn or damaged.
For windows, apply adhesive-backed foam tape along the frame where the sash meets it. Use V-strip weatherstripping in the channels where windows slide. For doors, install door sweeps at the bottom and weatherstripping around the sides and top.
Consider using silicone caulk to seal any visible gaps around window and door frames. Pay special attention to areas where different materials meet, such as where the frame meets the wall. These spots are prone to air leaks.
Reducing Energy Costs
Winterizing your single wide can significantly lower your energy bills. By implementing targeted strategies, you’ll enhance insulation, prevent drafts, and gain better control over your utility expenses.
Applying Spray Foam Insulation
Spray foam insulation is a highly effective method for sealing gaps and improving your single wide’s thermal envelope. This expandable foam fills cracks and crevices, creating an airtight barrier. Focus on areas prone to air leaks, such as windows, doors, and pipe entry points.
Apply spray foam to the underside of your mobile home’s floor to prevent heat loss through the foundation. For best results, use closed-cell foam, which offers superior insulation properties and moisture resistance.
Remember to wear protective gear and follow manufacturer instructions when applying spray foam. Consider hiring a professional for larger insulation projects to ensure proper coverage and safety.
Using Draft Stoppers
Draft stoppers are simple yet effective tools for preventing cold air infiltration. Place them at the base of exterior doors to seal gaps and maintain indoor temperatures. You can purchase ready-made draft stoppers or create your own using fabric tubes filled with sand or rice.
Install weatherstripping around windows and doors to further reduce air leaks. Adhesive-backed foam tape is an affordable option that’s easy to apply. For sliding windows, use V-seal weatherstripping to ensure a tight seal when closed.
Don’t forget interior doors leading to unheated spaces. Adding draft stoppers here helps contain warm air within your living areas, reducing the workload on your heating system.
Monitoring Utility Bills
Regularly tracking your energy consumption helps identify areas for improvement and verify the effectiveness of your winterization efforts. Review your monthly utility statements and compare them to previous years’ bills for the same period.
Look for unexpected spikes in usage, which may indicate equipment malfunctions or new sources of energy loss. Many utility companies offer online tools to analyze your consumption patterns and provide energy-saving tips.
Consider investing in a smart thermostat to optimize your heating schedule and track energy use in real-time. These devices can learn your preferences and automatically adjust temperatures for maximum efficiency.
Set a budget for your winter energy costs and monitor your progress throughout the season. This practice encourages mindful energy use and helps you stay on track with your savings goals.
Preventing Damage During Winter
Protecting your single wide from winter’s harsh elements is crucial for maintaining its structural integrity and your comfort. Proper preparation can prevent costly repairs and ensure a cozy living environment throughout the cold months.
Conducting a Roof Inspection
Start with a thorough roof inspection before winter sets in. Check for loose or damaged shingles, and replace them promptly. Seal any cracks or gaps with weatherproof caulking to prevent water infiltration.
Clear debris from gutters and downspouts to ensure proper drainage. Consider installing gutter guards to minimize future buildup.
Apply a roof coating designed for mobile homes to provide an extra layer of protection against leaks and improve insulation. This reflective barrier can also help reduce energy costs.
Securing Skirting and Underpinning
Inspect the skirting around your single wide for gaps or damage. Repair or replace sections as needed to create a solid barrier against cold air and pests.
Ensure the underpinning is secure and free from holes. Add insulation beneath the mobile home to prevent frozen pipes and maintain a warmer floor temperature.
Consider installing a wind wrap or insulated skirting for additional protection. This extra layer helps keep the underside of your home dry and reduces heat loss.
Ensuring Adequate Ventilation
Proper ventilation is key to preventing moisture buildup and mold growth during winter. Check that roof vents are clear and functioning correctly.
Install soffit vents if not already present. These allow air to circulate in the attic space, reducing condensation and ice dam formation.
Use dehumidifiers in problem areas to control indoor humidity levels. Aim for a relative humidity between 30-50% to maintain air quality and prevent moisture-related issues.
Regularly inspect windows and doors for condensation, which may indicate poor ventilation. Use exhaust fans in bathrooms and kitchens to remove excess moisture.